
What to Do If Your Hot Tub Isn’t Heating Properly
February 7, 2025How to Install an EV Charging Station at Home
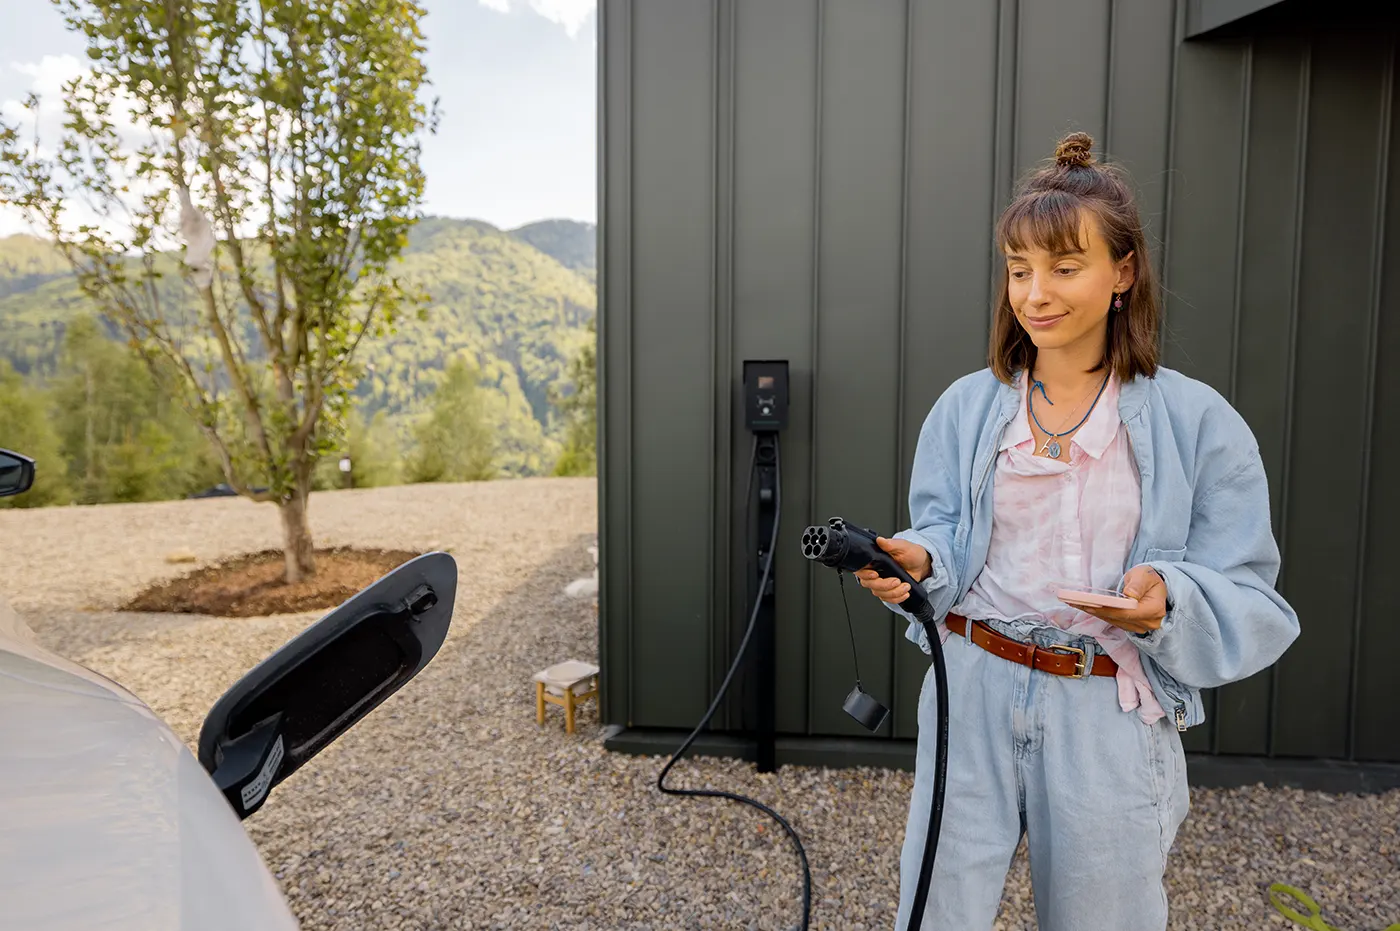
With electric vehicles (EVs) becoming increasingly popular, more drivers are realizing the importance of installing an EV charging station at home. Having your own charging setup offers unbeatable convenience and can save you a lot of time and money in the long run. Whether you’re new to the EV world or upgrading your existing system, this guide will walk you through everything you need to know about installing an EV charging station at home.
1. Understanding the Types of Electric Car Charging Stations
Before you install an EV charger, knowing which type of charging station is right for you is essential. There are three main types of chargers: Level 1, Level 2, and Level 3. Let’s break them down:
- Level 1 Charging: This is the most basic option. It uses a standard 120V outlet (the same type you’d plug in your toaster) and is usually included with your EV. While it's convenient for occasional charging, it’s very slow, and you’ll likely need to leave your car plugged in for an entire day to get a full charge.
- Level 2 Charging: A Level 2 EV charger requires a 240V outlet, like the one you’d use for a dryer or oven. It charges your EV much faster, usually taking only 3-8 hours for a full charge. This is the most popular option for home installations, as it offers a good balance of speed and convenience.
- Level 3 Charging (DC Fast Charging): These are high-speed chargers often found at public stations, but they’re not designed for home use due to the significant power requirements. For home charging, Level 2 is your best bet.
2. Benefits of Installing a Home Charging Station
There are plenty of reasons to install an EV charging station at home. Here is a quick look at some of the perks:
- Convenience: No more searching for charging stations or waiting in line. You can charge your car overnight, waking up to a fully charged vehicle every morning.
- Cost Savings: Charging at home is usually much cheaper than using public stations, especially if you use off-peak electricity rates. Plus, you’ll avoid paying the higher fees often associated with public charging.
- Increase in Home Value: As more people adopt electric vehicles, having an EV charging station can actually add value to your home. It’s a modern amenity that appeals to future buyers.
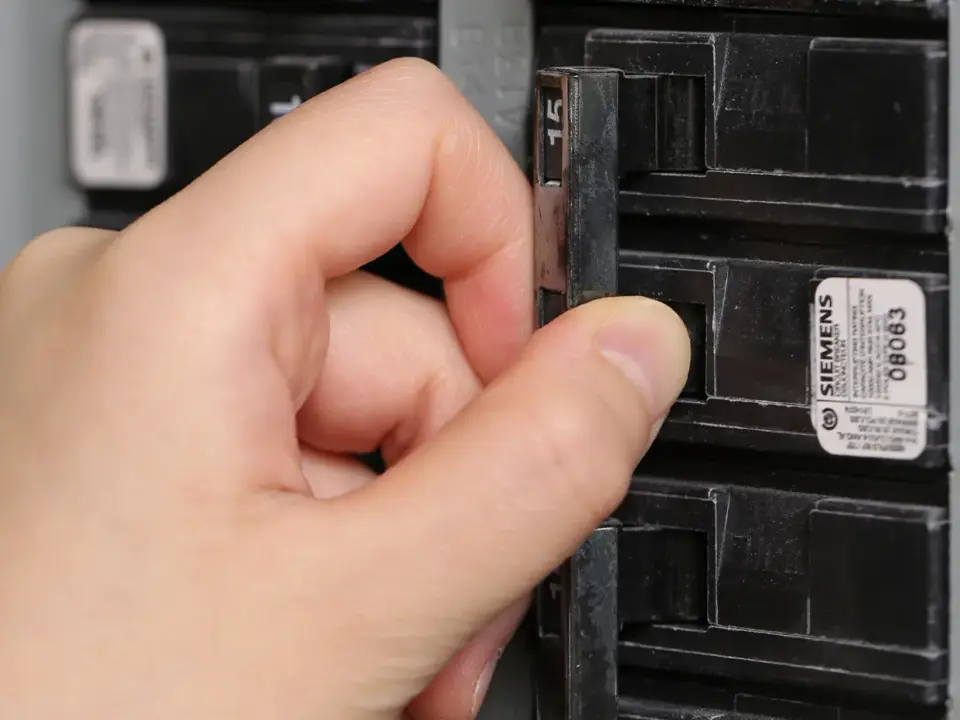
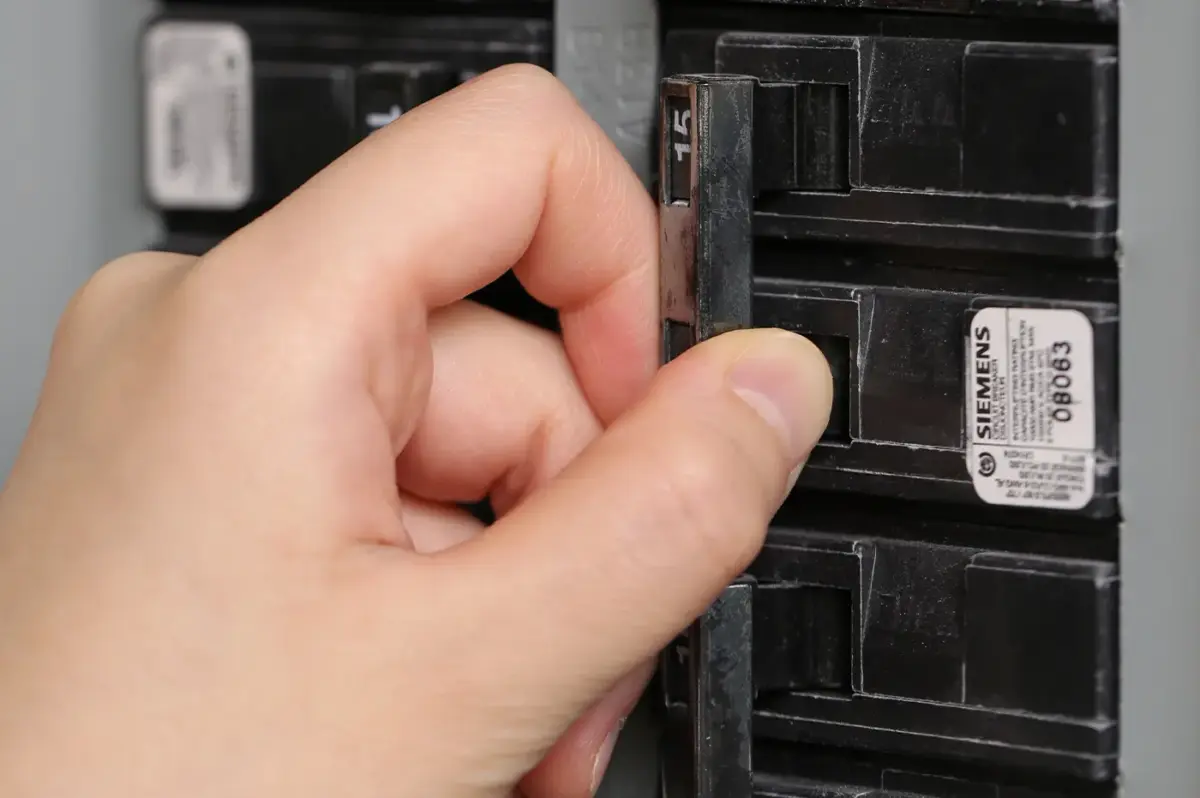
3. Assessing Your Home’s Electrical System
Before you install an EV charging station, it’s important to make sure that your home’s electrical system can handle the load.
- Check Electrical Panel Capacity: Most homes have a 100-amp or 200-amp electrical panel, but if your panel is older or already maxed out with other appliances, you might need an upgrade to accommodate the additional load from the charger.
- Upgrading Your Electrical Panel: If your panel needs an upgrade, this can add to the cost, but it’s necessary to ensure everything works safely and efficiently. A licensed electrician will help you determine if this upgrade is needed.
4. Choosing the Right Charging Equipment
When it comes to installing an EV charging station, choosing the right equipment is key. Here’s what you should look for:
- EVSE (Electric Vehicle Supply Equipment): This is the official name for the charging unit. When shopping for one, make sure it’s compatible with your EV model. Some cars, like Tesla, require proprietary connectors. However, others, like Nissan Leaf, use a standard J1772 connector.
- Top Brands: There are a few well-known brands to consider when shopping for your charger. Popular choices include Tesla, ChargePoint, and JuiceBox. Each brand offers unique features such as app integrations, wifi connectivity, etc.
- Cost of Equipment: Expect to pay anywhere from $400 to $1,000 for the unit itself. While more expensive models may have additional features, like smart charging or energy usage tracking, most home users can get by with a mid-range model.
- Smart Features: Many modern chargers come with smart features that allow you to monitor charging sessions via an app. These can help you optimize charging times based on electricity rates or track your energy usage for budgeting purposes.
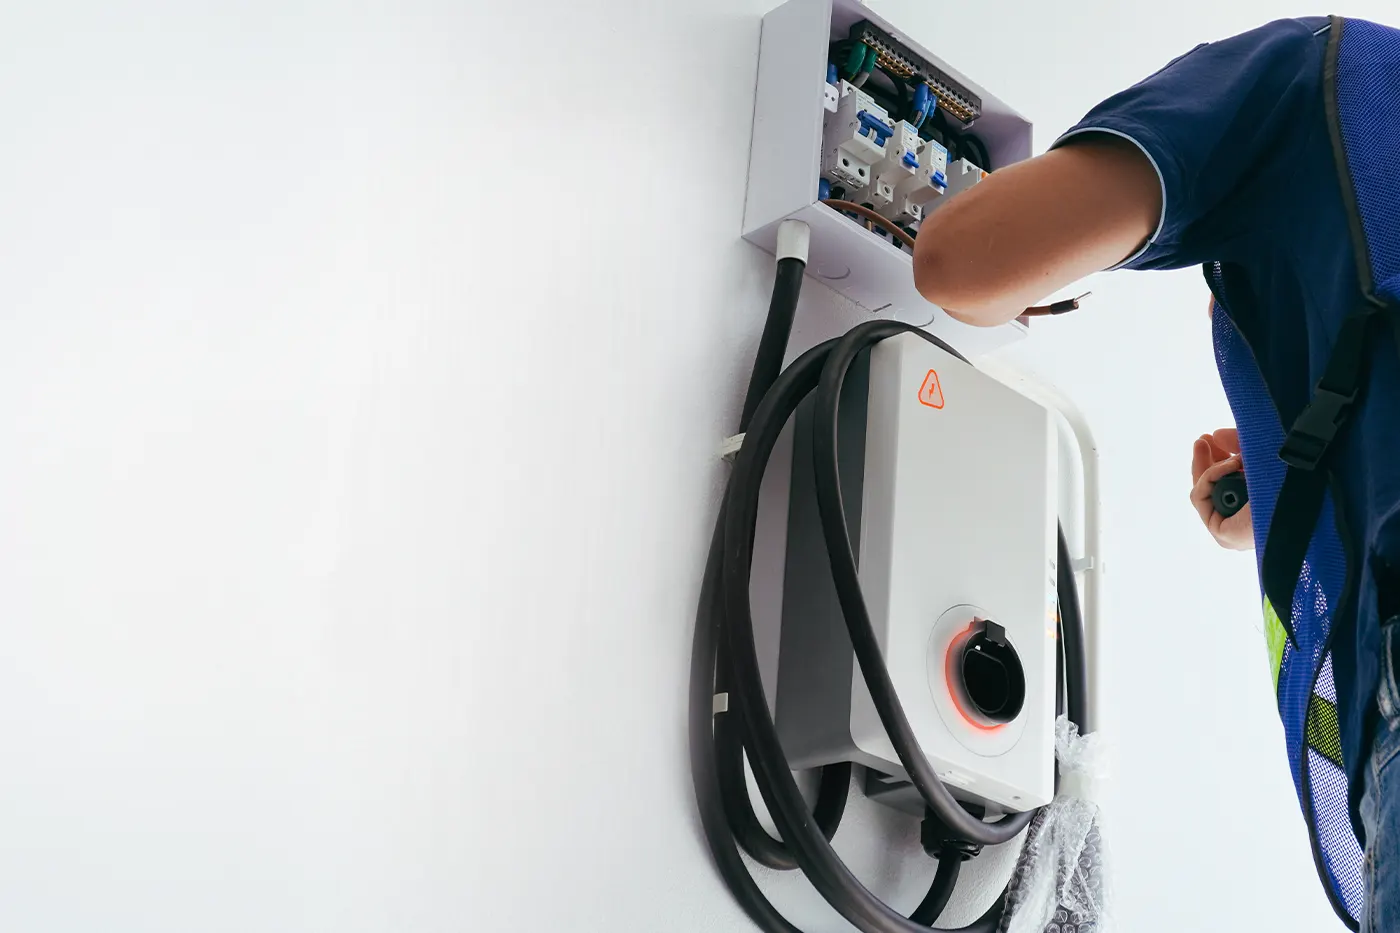
5. Getting Permits and Hiring a Proffesional Electrician
Installing an EV charging station at home isn’t something everyone can handle on their own, especially if it involves an upgrade of your electrical panel. Here are some important steps to keep in mind:
- Permits: Before starting the installation process, check with your local government to see if you need a permit. While some areas don’t require one, others may have specific regulations regarding electrical work or the installation of charging equipment.
- Hiring an Electrician: Always hire a licensed electrician who has experience with EV charging station installations. A professional will ensure that everything is set up safely and according to local electrical codes. Additionally, electricians can also help you choose a charger and submit required permits on your behalf.
- Installation Process: Your electrician do the charger installation, including running the proper wiring, installing a dedicated circuit, and setting up the outlet. This typically takes about 4 to 6 hours for a straightforward installation.
6. Installation Process: Step-by-Step
- Step 1: Choose a Location: Start by choosing a location that’s easy to access and safe. You’ll want it close to your parking area and preferably near the electrical panel. Be sure to keep it away from any potential hazards, like water sources or flammable materials.
- Step 2: Install the Charging Circuit: Your electrician will run a dedicated circuit from the electrical panel to the location of the charger. This step ensures that your charger has a steady, reliable power supply without overloading your home’s system.
- Step 3: Mount the Charger: After the wiring is set up, the electrician will mount the charger either on the wall or on a post. They’ll place it at a height that makes it simple to plug in your vehicle.
- Step 4: Test and Activate: Once everything is wired and in place, your electrician will test the system to make sure everything functions correctly. Once everything’s verified, you’ll be all set to start charging!
7. Maintenance and Troubleshooting Tips
After installing your EV charging station, it's important to maintain it properly to ensure longevity and smooth operation.
- Regular Inspections: Check the cables and connectors for any signs of wear or damage. Make sure the charger is securely mounted and the wiring is intact.
- Troubleshooting Common Issues: Some issues you might encounter include faulty connections or the charger not powering on. If you’re unsure about the problem, it’s best to call your electrician for help.
- Professional Maintenance: If you notice any persistent issues, such as the charger not working properly, call a licensed electrician for repairs or maintenance.
8. Cost Breakdown and Return on Investment (ROI)
Now that you know the process, let’s talk about the costs involved.
- Potential Savings: By charging your car at home, you’ll save on public charging fees, which can often be more expensive. Additionally, you can take advantage of lower electricity rates during off-peak hours.
- Incentives and Rebates: Don’t forget to check for any government incentives or rebates for installing an EV charging station. Many states and municipalities offer rebates to help offset installation costs.
Start Charging Smarter at Home
Installing an EV charging station at home is a great option for any EV owner. It’s convenient, helps you save money, and can even add value to your home. By having a little more knowledge and an experienced electrician, your EV charging station is well within reach.
Ready to make the switch? Contact us for Your EV charging station installation!
